Genome annotation using Prokka
Background
In this section we will use a software tool called Prokka to annotate the draft genome sequence produced in the previous tutorial. Prokka is a “wrapper”; it collects together several pieces of software (from various authors), and so avoids “re-inventing the wheel”.
Prokka finds and annotates features (both protein coding regions and RNA genes, i.e. tRNA, rRNA) present on on a sequence. Note, Prokka uses a two-step process for the annotation of protein coding regions: first, protein coding regions on the genome are identified using Prodigal; second, the function of the encoded protein is predicted by similarity to proteins in one of many protein or protein domain databases. Prokka is a software tool that can be used to annotate bacterial, archaeal and viral genomes quickly, generating standard output files in GenBank, EMBL and gff formats. More information about Prokka can be found here.
Learning objectives
At the end of this tutorial you should be able to:
- load a genome assembly into Prokka
- annotate the assembly using Prokka
- examine the annotated genome using JBrowse
Input data
Prokka requires assembled contigs.
-
If you are continuing on from the previous workshop (Assembly with Spades), this file will be in your current history:
SPAdes_contigs.fasta . -
Alternatively, download the assembled contigs from the Training dataset page.
Run Prokka
- In Galaxy, go to
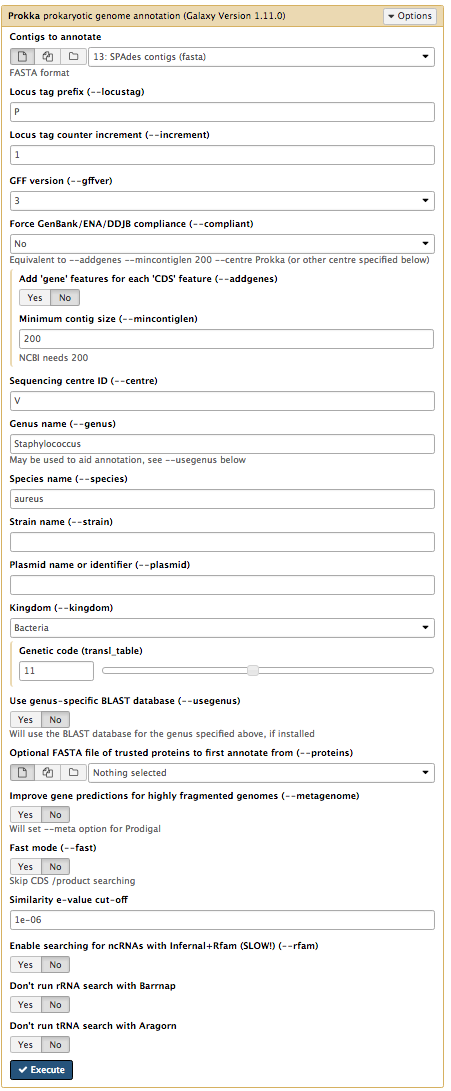
Tools → NGS Analysis → NGS: Annotation → Prokka - Set the following parameters (leave everything else unchanged):
Contigs to annotate :SPAdes contigs (fasta) Locus tag prefix (–locustag) : PForce GenBank/ENA/DDJB compliance (–compliant) : NoSequencing Centre ID (–centre) : VGenus Name : StaphylococcusSpecies Name : aureusUse genus-specific BLAST database No
Your tool interface should look like this:
- Click
Execute
Examine the output
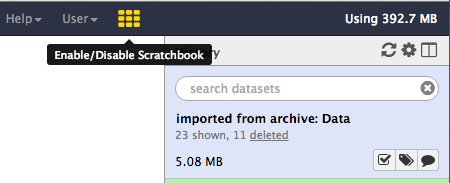
First, enable Scratchbook in Galaxy - this allows you to view several windows simultaneously. Click on the 3×3 squares icon on the menu bar:
Once Prokka has finished, examine each of its output files.
- The GFF and GBK files contain all of the information about the features annotated (in different formats.)
- The
.txt file contains a summary of the number of features annotated. - The
.faa file contains the protein sequences of the genes annotated. - The
.ffn file contains the nucleotide sequences of the genes annotated.
View annotated features in JBrowse
Now that we have annotated the draft genome sequence, we would like to view the sequence in the JBrowse genome viewer.
-
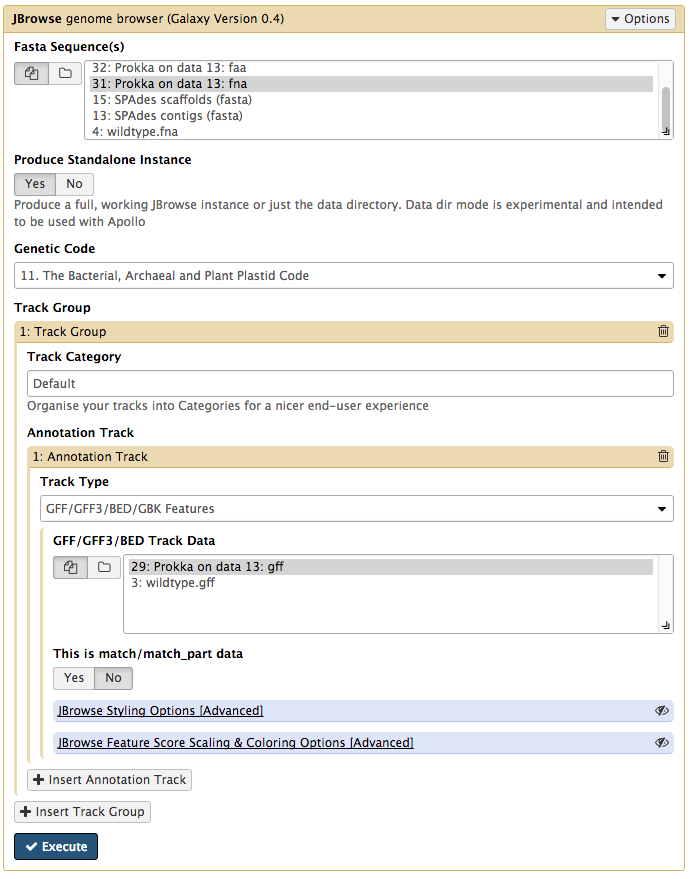
Go to
Statistics and Visualisation → Graph/Display Data → JBrowse -
Under
Fasta Sequence(s) chooseProkka on data XX:fna . This sequence will be the reference against which annotations are displayed. -
For
Produce a Standalone Instance select Yes. -
For
Genetic Code choose 11: The Bacterial, Archaeal and Plant Plastid Code. -
Click
Insert Track Group -
Click
Insert Annotation Track -
For
Track Type choose GFF/GFF3/BED/GBK Features -
For
GFF/GFF3/BED Track Data selectProkka on data XX:gff [Note: not wildtype.gff]
Your tool interface should look like this:
-
Click
Execute -
A new file will be created, called
JBrowse on data XX and data XX - Complete . Click on the eye icon next to the file name. The JBrowse window will appear in the centre Galaxy panel. -
Under
Available Tracks on the left, tick the box forProkka on data XX:gff . -
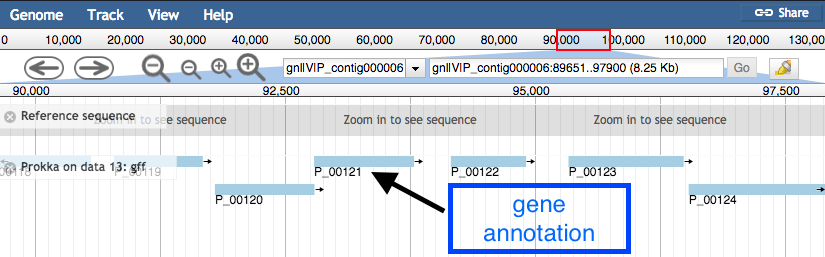
Select contig 6 in the drop down box. You can only see one contig displayed at a time.
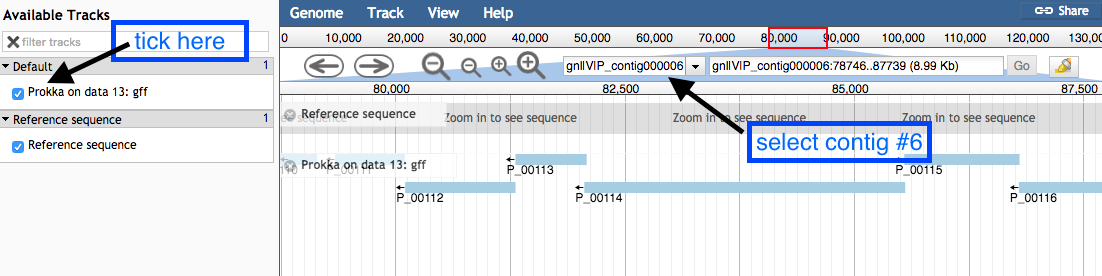
- Use the plus and minus buttons to zoom in and out, and the arrows to move left or right (or click and drag within the window to move left or right).
Zoomed out view:
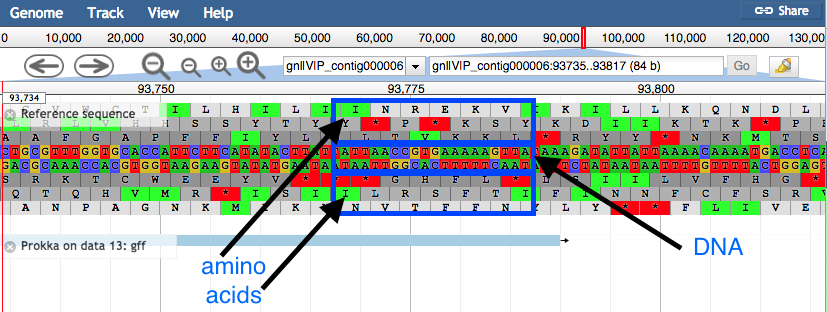
Zoom in to see the reference sequence at the top. JBrowse displays the sequence and a 6-frame amino acid translation.
Zoomed in view:
- Click on a gene/feature annotation (the bars on the annotation track) to see more information.
- gene name
- product name
- you can download the FASTA sequence by clicking on the disk icon.