Data Libraries

 Helena Rasche
 Saskia Hiltemann
OverviewQuestions:Objectives:
How do data libraries work?
What are they good for?
How can I use them?
How can I setup permissions for them?
Requirements:
Setup a data library
Manage permissions
Import data from disk
- Galaxy Server administration
- Ansible: slides slides - tutorial hands-on
- Galaxy Installation with Ansible: slides slides - tutorial hands-on
- Galaxy Tool Management with Ephemeris: slides slides - tutorial hands-on
Time estimation: 30 minutesSupporting Materials:Last modification: Sep 28, 2022
 Questions:
Data libraries are a great way to provide structured repositories of data to everyone on your server, or to a subset of your users. Datasets in libraries do not count against user quotas, so they are commonly used to provide the results of a sequencing run or similar project to a group of users on the servers.

Agenda
Comment: Galaxy Admin Training PathThe yearly Galaxy Admin Training follows a specific ordering of tutorials. Use this timeline to help keep track of where you are in Galaxy Admin Training.
Setup
Before we can import local data, we need to configure Galaxy to permit this. Additionally we will setup an example data library which we can use for demonstrative purposes.
Hands-on: Setting up Data Libraries
We will add a pre-task to clone a data repository into your machine. We will use this as the source for a library dataset.
--- a/galaxy.yml +++ b/galaxy.yml @@ -8,6 +8,9 @@ - name: Install Dependencies package: name: ['acl', 'bzip2', 'git', 'make', 'python3-psycopg2', 'tar', 'virtualenv'] + - git: + repo: 'https://github.com/usegalaxy-eu/libraries-training-repo' + dest: /libraries/ roles: - galaxyproject.postgresql - role: natefoo.postgresql_objectsIf you haven’t worked with diffs before, this can be something quite new or different.
If we have two files, let’s say a grocery list, in two files. We’ll call them ‘a’ and ‘b’.
Old $ cat old
🍎
🍐
🍊
🍋
🍒
🥑New $ cat new
🍎
🍐
🍊
🍋
🍍
🥑We can see that they have some different entries. We’ve removed 🍒 because they’re awful, and replaced them with an 🍍
Diff lets us compare these files
$ diff old new
5c5
< 🍒
---
> 🍍
Here we see that 🍒 is only in a, and 🍍 is only in b. But otherwise the files are identical.
There are a couple different formats to diffs, one is the ‘unified diff’
$ diff -U2 old new
--- old	2022-02-16 14:06:19.697132568 +0100
+++ new	2022-02-16 14:06:36.340962616 +0100
@@ -3,4 +3,4 @@
 🍊
 🍋
-🍒
+🍍
 🥑
This is basically what you see in the training materials which gives you a lot of context about the changes:
--- oldis the ‘old’ file in our view+++ newis the ‘new’ file- @@ these lines tell us where the change occurs and how many lines are added or removed.
- Lines starting with a - are removed from our ‘new’ file
- Lines with a + have been added.
So when you go to apply these diffs to your files in the training:
- Ignore the header
- Remove lines starting with - from your file
- Add lines starting with + to your file
The other lines (🍊/🍋 and 🥑) above just provide “context”, they help you know where a change belongs in a file, but should not be edited when you’re making the above change. Given the above diff, you would find a line with a 🍒, and replace it with a 🍍
Added & Removed Lines
Removals are very easy to spot, we just have removed lines
--- old	2022-02-16 14:06:19.697132568 +0100
+++ new	2022-02-16 14:10:14.370722802 +0100
@@ -4,3 +4,2 @@
 🍋
 🍒
-🥑
And additions likewise are very easy, just add a new line, between the other lines in your file.
--- old	2022-02-16 14:06:19.697132568 +0100
+++ new	2022-02-16 14:11:11.422135393 +0100
@@ -1,3 +1,4 @@
 🍎
+🍍
 🍐
 🍊
Completely new files
Completely new files look a bit different, there the “old” file is
/dev/null, the empty file in a Linux machine.$ diff -U2 /dev/null old
--- /dev/null 2022-02-15 11:47:16.100000270 +0100
+++ old 2022-02-16 14:06:19.697132568 +0100
@@ -0,0 +1,6 @@
+🍎
+🍐
+🍊
+🍋
+🍒
+🥑And removed files are similar, except with the new file being /dev/null
--- old	2022-02-16 14:06:19.697132568 +0100
+++ /dev/null	2022-02-15 11:47:16.100000270 +0100
@@ -1,6 +0,0 @@
-🍎
-🍐
-🍊
-🍋
-🍒
-🥑
Take a minute to explore the folders in our sample library.. These will be important when we start loading data.
Edit the file
group_vars/galaxyservers.ymland set the following variables:--- a/group_vars/galaxyservers.yml +++ b/group_vars/galaxyservers.yml @@ -29,6 +29,8 @@ miniconda_manage_dependencies: false galaxy_config: galaxy: + library_import_dir: /libraries/admin + user_library_import_dir: /libraries/user dependency_resolvers_config_file: "{{ galaxy_config_dir }}/dependency_resolvers_conf.xml" containers_resolvers_config_file: "{{ galaxy_config_dir }}/container_resolvers_conf.xml" tool_data_table_config_path: /cvmfs/data.galaxyproject.org/byhand/location/tool_data_table_conf.xml,/cvmfs/data.galaxyproject.org/managed/location/tool_data_table_conf.xmlNote that the
/libraries/adminwill refer to a folder within the libraries-training-repo that we cloned in the pre-task, and likewise for/libraries/userRun the playbook:
Input: Bashansible-playbook galaxy.yml
Importing Data
There are multiple options for importing data from your server, we’ll go through all of your choices below. But first, let’s take a quick look at the example library structure we’ve provided.
Input: Bashtree /librariesOutput: Bash/libraries/ ├── admin │ └── admin-wildtype.fna ├── example-library.yaml ├── README.md └── user ├── admin@example.com │ └── user-wildtype.fna └── admin@example.org └── user-wildtype.fna 4 directories, 5 files
Note that in the user directories, admin@example.com and example.org are used, if you’ve used a different email address for your admin user, you’ll need to copy one of these directories.
1.sh
We have a directory named admin, which will be available to all admin users (we set library_import_dir: /libraries/admin earlier.)
Additionally we have a user directory, below the user directory are more directories with the user’s email as they directory key. Data can be placed in here, and it will become accessible to those users (we set user_library_import_dir: /libraries/user for this.)

from History
This is by far the easiest and most convenient option for small datasets, or datasets that are just already in a history
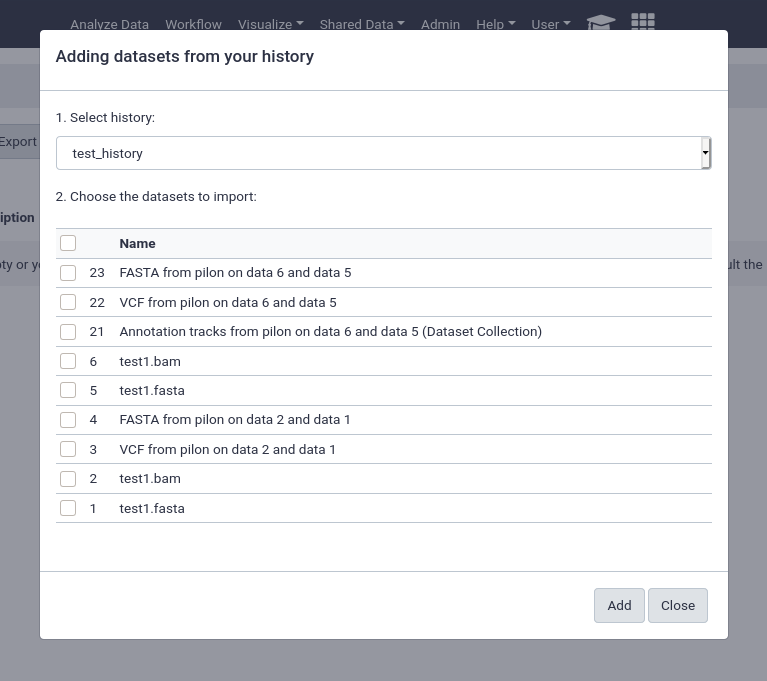
You can easily select multiple files and quickly import them.
from User Directory
If user directories are configured, as we did at the beginning of this tutorial, then users will be able to import any files under their personal directory. This can be used for a wide variety of setups, e.g. providing the output of sequencing machines to users. This can point to the same directory structure that’s used by the FTP service, if you want your users to be able to import files directly from FTP.
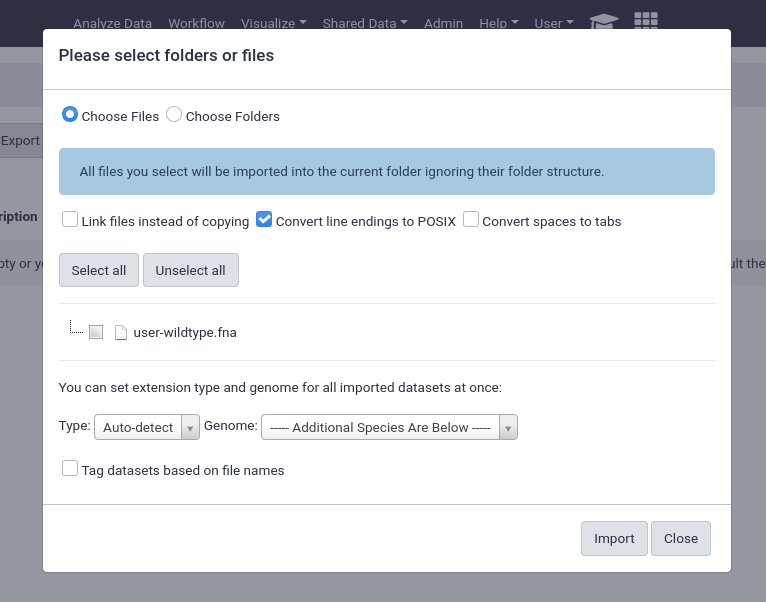
This will enable the option for everyone, any unprivileged user with a folder in the user_library_import_dir directory and permissions on a data library can import things from their import directory.
We pre-created a directory for someone registered as
admin@example.org, but if you are logged in with an account registered with a different email, you’ll see nothing.You can fix this by going into /libraries/user and
cp -Rv admin@example.org whatever-email-you-usedThen it should appear in Galaxy.
from import Directory (Admins only)
Similarly to the user import directories, there is the option to have an admin only import area. If one admin is responsible for creating the data libraries and importing data this can be a good option.
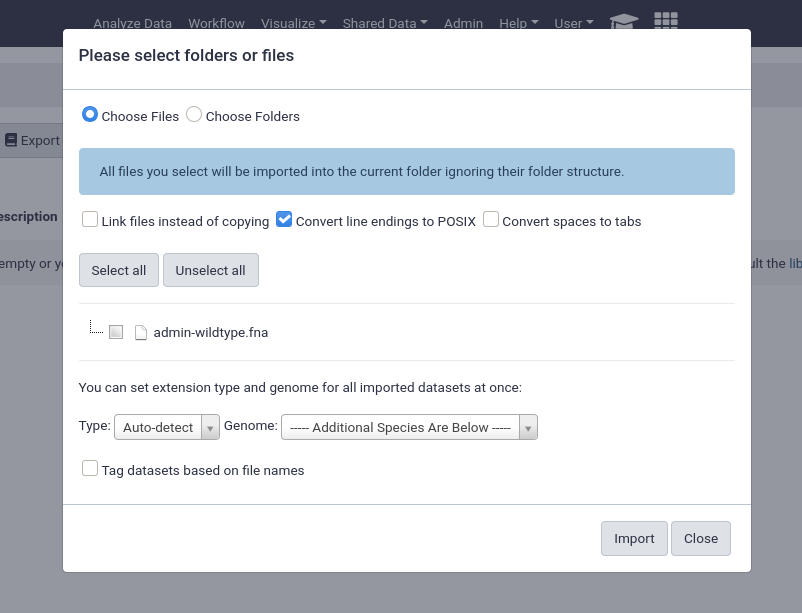
An important feature of data libraries importing is the ability to “link files instead of copying”. If you know your data will not be deleted (e.g. sequencing data sitting on an NFS), then you can use this option to further decrease the amount of storage your Galaxy server requires. The datasets can be used as if they were normal datasets, imported by users and analysed, but not imported into the Galaxy data storage area.
Automatically Populating a Data Library
If your data is accessible via URL, you can write a yaml file to import and setup the data library automatically. We’ve included this file in the example data libraries repository we cloned at the beginning:
Input: Bashcat /libraries/example-library.yaml
Output: Bash--- destination: type: library name: Mouse sequencing project description: some data synopsis: samples collected from somewhere items: - url: https://zenodo.org/api/files/287966da-5411-4f79-8cfb-0ffa84d0d6cc/wildtype.fna src: url ext: fasta info: https://doi.org/10.5281/zenodo.582600 - name: A directory description: Exome sequencing means that all protein-coding genes in a genome are items: - url: https://zenodo.org/api/files/287966da-5411-4f79-8cfb-0ffa84d0d6cc/mutant_R1.fastq src: url ext: fastqsanger info: https://doi.org/10.5281/zenodo.582600 - url: https://zenodo.org/api/files/287966da-5411-4f79-8cfb-0ffa84d0d6cc/mutant_R2.fastq src: url ext: fastqsanger info: https://doi.org/10.5281/zenodo.582600
Let’s try setting that up in our Galaxy!
Galaxy admin accounts are specified as a comma-separated email list in the
admin_usersdirective ofgalaxy.yml. If you have set up your Galaxy server using the Galaxy Installation with Ansible tutorial, this is set toadmin@example.org.
- In your browser, open your Galaxy homepage
- Log in, or register a new account, if it’s the first time you’re logging in
- Go to
User -> Preferencesin the top menu bar, then click onManage API key- If there is no current API key available, click on
Create a new keyto generate it- Copy your API key to somewhere convenient, you will need it throughout this tutorial
Hands-on: hands-on: importing data library yaml.
re-activate the virtualenv you created for the ephemeris tool management tutorial.
Input: input: bash. ~/ephemeris_venv/bin/activatethen you might need to re-run the steps:
virtualenv -p python3 ~/ephemeris_venv
. ~/ephemeris_venv/bin/activate
pip install ephemeris
we’ll use the
setup-data-librariescommand to install the data in this yaml file into a library in our galaxy.Input: input: bashsetup-data-libraries -g https://your-galaxy -a <api-key> --training -i /libraries/example-library.yaml --legacyOutput: outputlibrary name: mouse sequencing projectthis command is safe to re-run. for example if you update the yaml, it will simply report that the library exists before ensuring all files exist in their appropriate location:
library name: mouse sequencing project
library already exists! id: f597429621d6eb2b
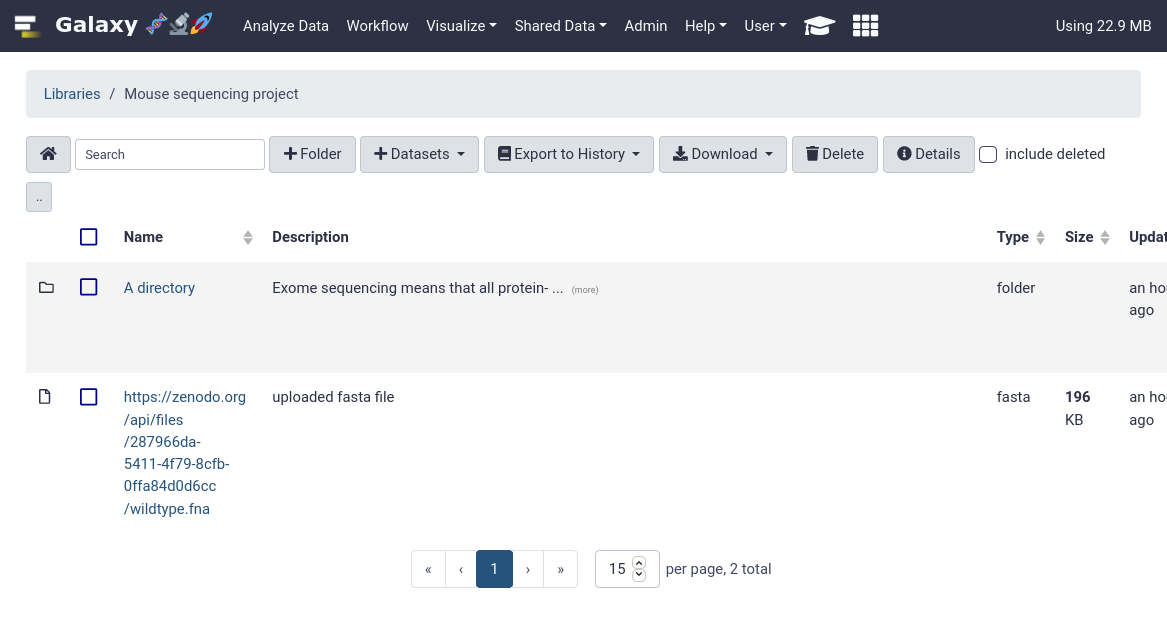
That’s it! You should be able to see your newly created data library in your Galaxy.
2.sh
Comment: Got lost along the way?If you missed any steps, you can compare against the reference files, or see what changed since the previous tutorial.
If you’re using
gitto track your progress, remember to add your changes and commit with a good commit message!
Note that we’ve used some special flags here, --training and --legacy. Training sets some defaults that make sense for the GTN (mostly around library descriptions / etc.)
--legacy
This enables the use of legacy APIs even for newer Galaxies that should have a batch upload API enabled. Unfortunately the new batch upload API is not able to update existing data libraries in place and will always create new libraries with the same name. So currently --legacy is quite useful for maintaining a YAML file, and running setup-data-libraries regularly whenever that file has updates.
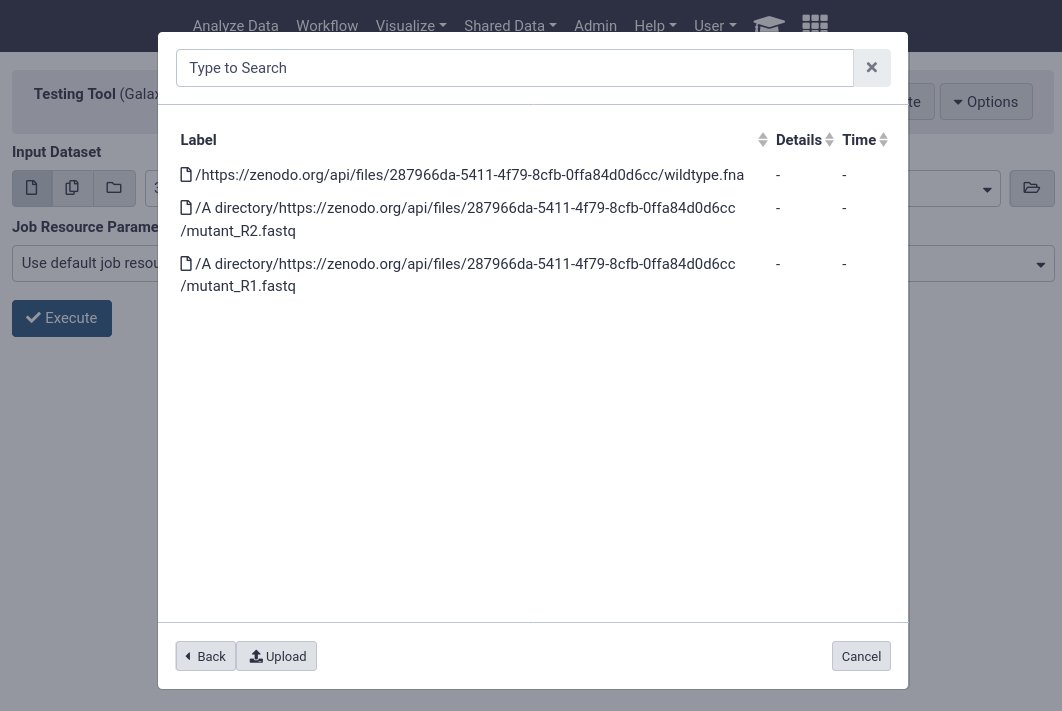
But this comes with the downside that the entire URL is used for the filename.
GTN Data
This process scales quite well. Galaxy Europe, in their mission to support all of the GTN materials on their server setup a shared-data repository, a single giant YAML file with all of the data from the GTN tutorials. This was then expanded to other UseGalaxy.* servers to provide synced training libraries for all of the major servers.
Do you want the training data synced on your server? If so join the shared data repository! If you provide us with a non-admin API key and a data library to upload data into, we can sync this automatically.
Using Data from Libraries
Users can now conveniently use datasets in libraries when they are running analyses, without having to import them first.
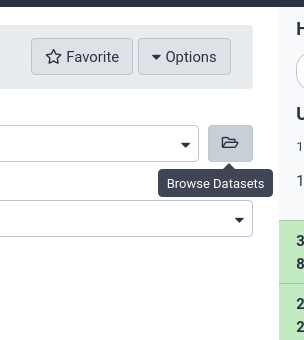
The tool form provides a button on the right of every dataset selector which allows users to “Browse datasets”
Users can then choose from datasets in their history, or browse through the data libraries
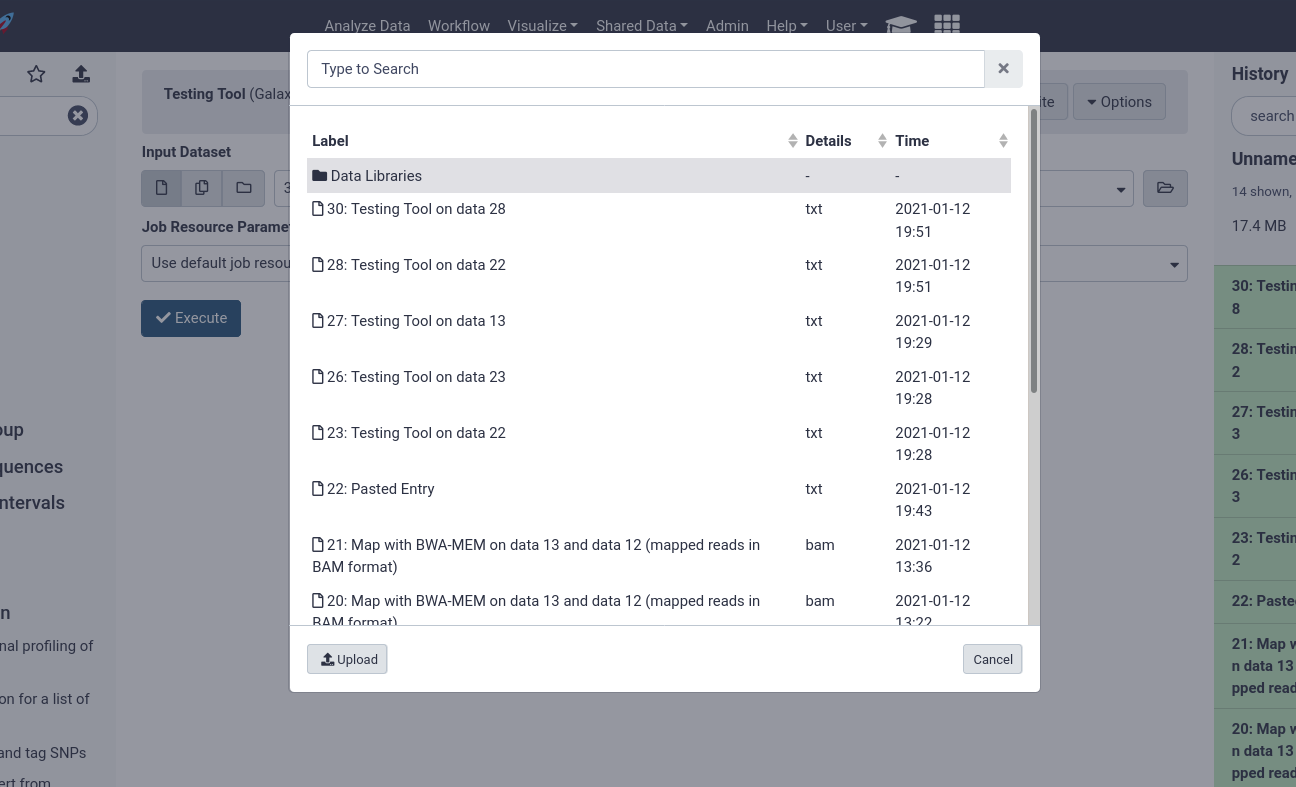
Here users can see every file accessible to them in the data library to begin analysing.
Key points
Data libraries are a great way to share data with groups of users
Frequently Asked Questions
Have questions about this tutorial? Check out the tutorial FAQ page or the FAQ page for the Galaxy Server administration topic to see if your question is listed there. If not, please ask your question on the GTN Gitter Channel or the Galaxy Help ForumFeedback
Did you use this material as an instructor? Feel free to give us feedback on how it went.
Did you use this material as a learner or student? Click the form below to leave feedback.

Citing this Tutorial
- Helena Rasche, Saskia Hiltemann, Data Libraries (Galaxy Training Materials). https://training.galaxyproject.org/training-material/topics/admin/tutorials/data-library/tutorial.html Online; accessed TODAY
- Batut et al., 2018 Community-Driven Data Analysis Training for Biology Cell Systems 10.1016/j.cels.2018.05.012
Congratulations on successfully completing this tutorial!@misc{admin-data-library, author = "Helena Rasche and Saskia Hiltemann", title = "Data Libraries (Galaxy Training Materials)", year = "", month = "", day = "" url = "\url{https://training.galaxyproject.org/training-material/topics/admin/tutorials/data-library/tutorial.html}", note = "[Online; accessed TODAY]" } @article{Batut_2018, doi = {10.1016/j.cels.2018.05.012}, url = {https://doi.org/10.1016%2Fj.cels.2018.05.012}, year = 2018, month = {jun}, publisher = {Elsevier {BV}}, volume = {6}, number = {6}, pages = {752--758.e1}, author = {B{\'{e}}r{\'{e}}nice Batut and Saskia Hiltemann and Andrea Bagnacani and Dannon Baker and Vivek Bhardwaj and Clemens Blank and Anthony Bretaudeau and Loraine Brillet-Gu{\'{e}}guen and Martin {\v{C}}ech and John Chilton and Dave Clements and Olivia Doppelt-Azeroual and Anika Erxleben and Mallory Ann Freeberg and Simon Gladman and Youri Hoogstrate and Hans-Rudolf Hotz and Torsten Houwaart and Pratik Jagtap and Delphine Larivi{\`{e}}re and Gildas Le Corguill{\'{e}} and Thomas Manke and Fabien Mareuil and Fidel Ram{\'{\i}}rez and Devon Ryan and Florian Christoph Sigloch and Nicola Soranzo and Joachim Wolff and Pavankumar Videm and Markus Wolfien and Aisanjiang Wubuli and Dilmurat Yusuf and James Taylor and Rolf Backofen and Anton Nekrutenko and Björn Grüning}, title = {Community-Driven Data Analysis Training for Biology}, journal = {Cell Systems} }